Deploying a resource group
In the following section, we are going to run through an exercise of creating a resource group using the Azure portal. Proceed as follows:
- In the Azure portal, select the hamburger menu icon and click Resource groups, as illustrated in the following screenshot:
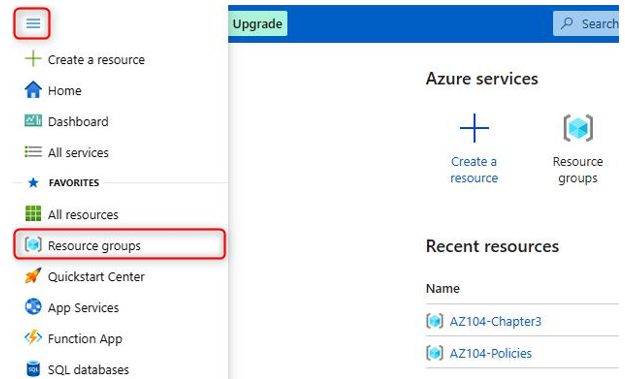
Figure 4.1 – Selecting the Resource groups blade
- Click Create, as illustrated in the following screenshot:

Figure 4.2 – Creating a resource group
- Enter a resource group name, choose a location, and click Next: Tags > if you wish to add tags to the resource group. Alternatively, click Review + create to jump to the review pane. In this example, we will click Review + create, as illustrated here:
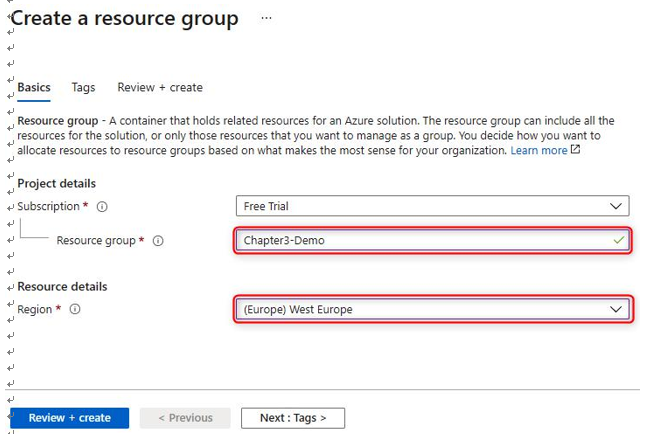
Figure 4.3 – Basics tab: creating a resource group
- Upon successful validation, click Create, as illustrated in the following screenshot:
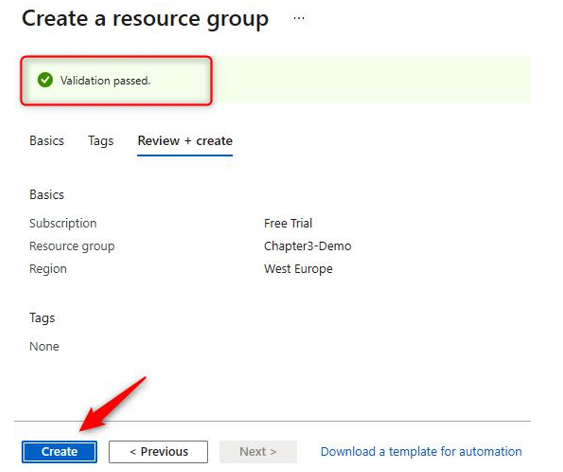
Figure 4.4 – Review + create tab: creating a resource group
- You will receive a notification to indicate the successful creation of the resource group, as illustrated in the following screenshot:
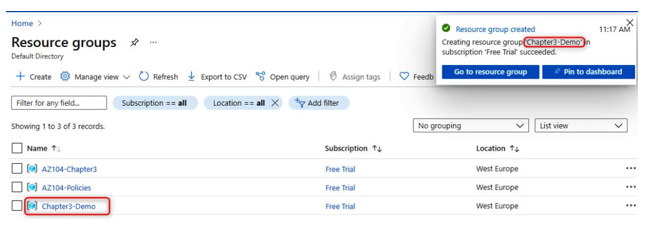
Figure 4.5 – Resource group overview
You have now learned to deploy a resource group through the Azure portal. In the next section, we will uncover how to view existing resource groups.
Top Tip
Resource group names must be unique names per subscription.
Listing resource groups
On some occasions, we may want to see which resource groups we have or utilize existing resource groups for future deployments. To do this, we will perform the following steps:
- On the Azure portal, select the hamburger menu icon and click Resource groups, as illustrated in the following screenshot:
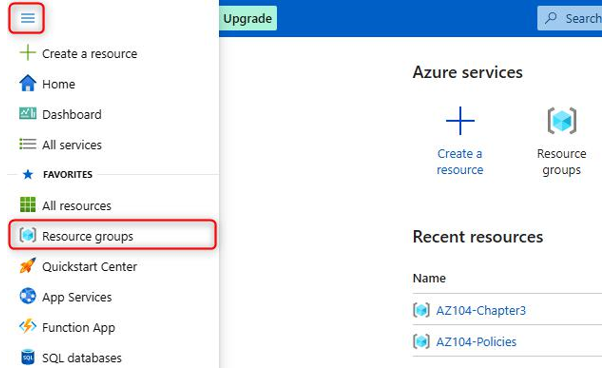
Figure 4.6 – Selecting the Resource groups blade
- In the following screenshot, notice all the resource groups identified by the Name, Subscription, and Location values:
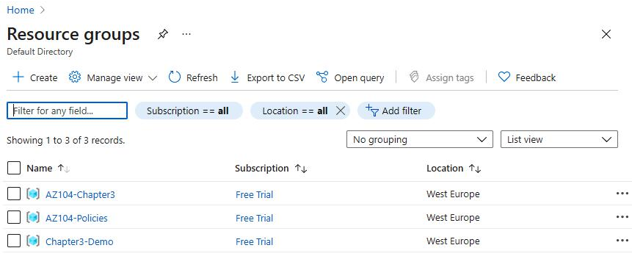
Figure 4.7 – Listing resource groups
You now know how to list resource groups that exist within your subscription. In the next section, we will explore the process behind deleting resource groups.

